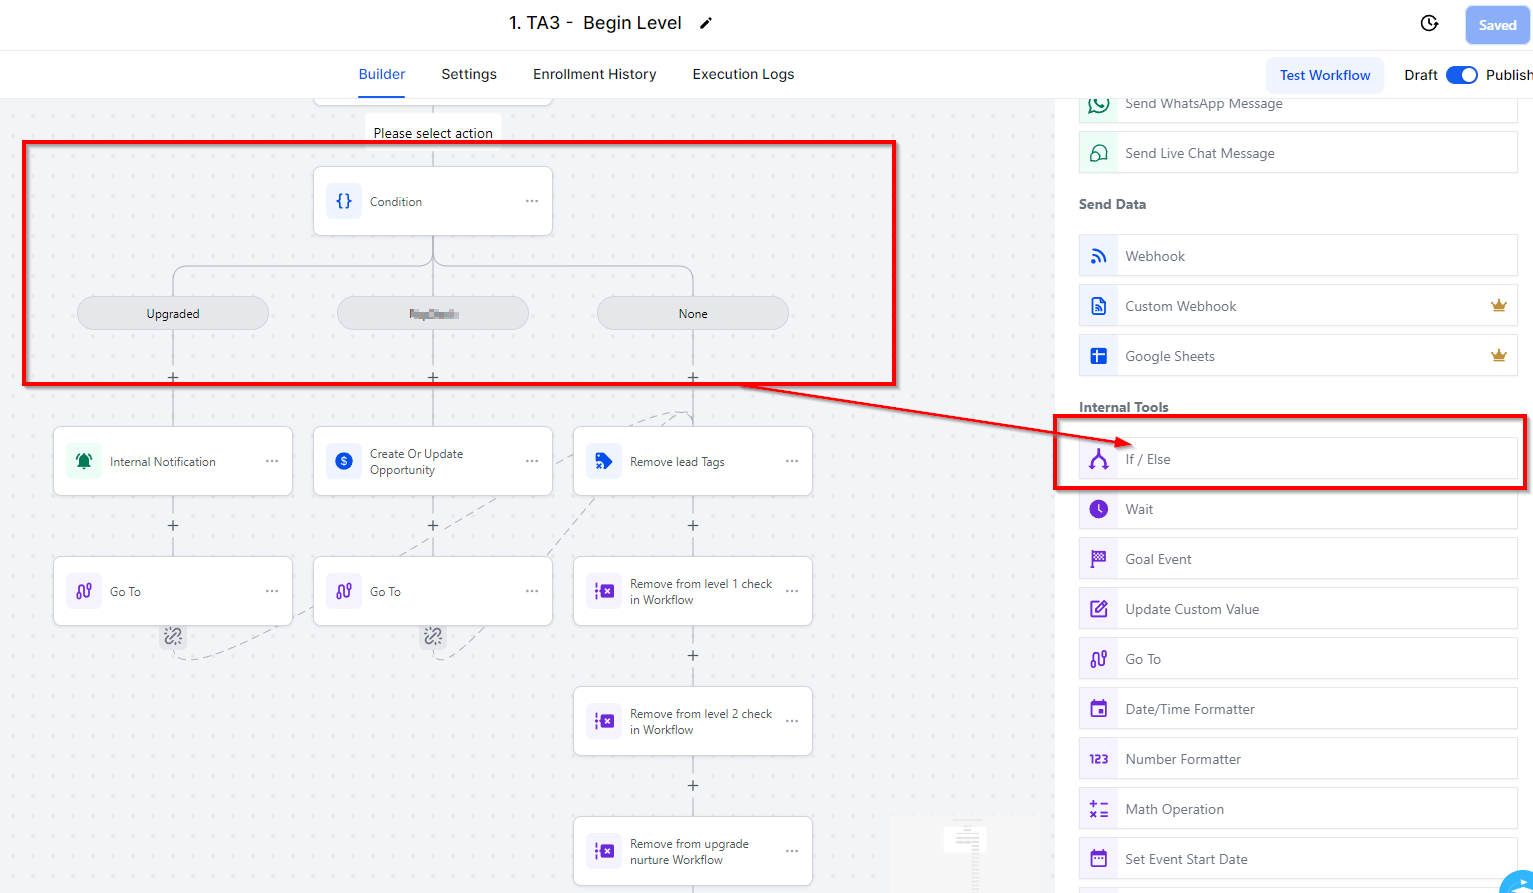
The If/Else Event action is triggered when a specific condition is met, and it can subsequently guide contacts towards other workflow actions. Utilize this workflow action when you want to split a workflow into paths based on condition, such as tags or custom values.
In order to PUBLISH workflows, you will need to establish a workflow trigger and a workflow action. Without both, you will only be able to save the workflow, not publish it.
Creating If/Else Conditional Logic
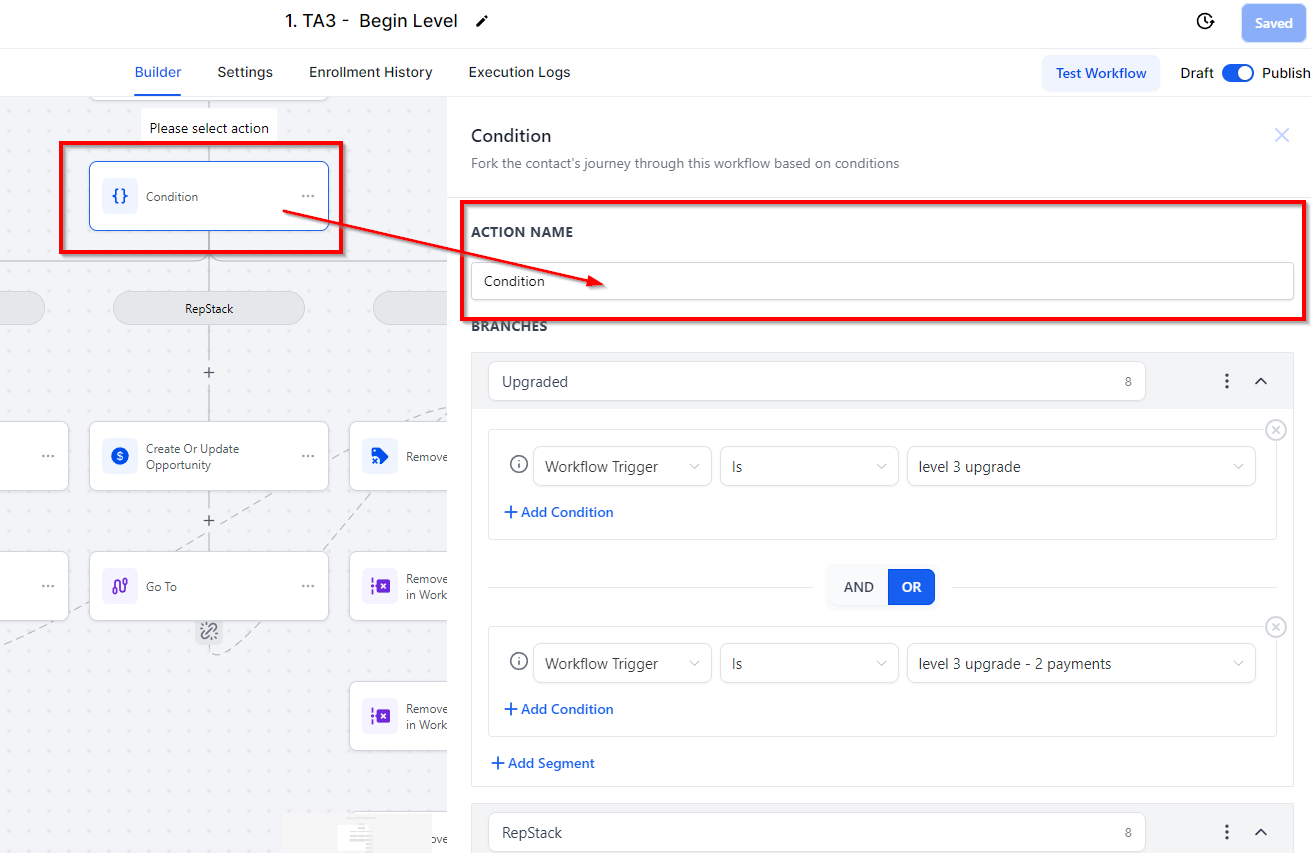
Naming an If/Else Condition
To add If/Else conditional logic to a workflow, it is essential to name the condition based on the intended objective. Once you have determined the name, you can proceed to the next steps.
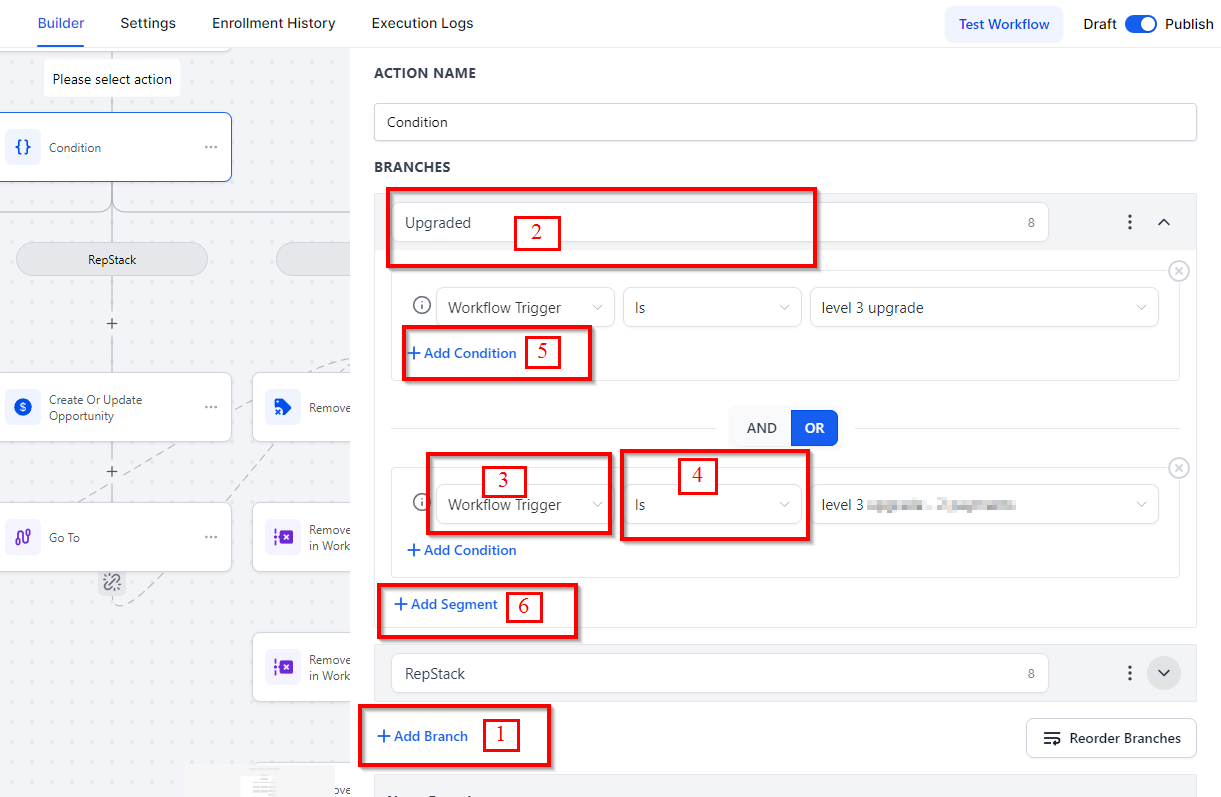
Steps to Adding an If/Else Event
- Add Branch: Click on add branch option to add a new branch.
- Branch Name: Name the branch for quick identification.
- Add Segment: Select the segment as per your objective.
- Select Operator: Select the operator from the dropdown menu.
- Add Condition: Use this to add one or more conditions within the branch.
- Add more Segment: Use this to add more segments as per the task requirements.
Branches
Using branches in a workflow enables you to create advanced conditions and segments in each branch for building a sequence of workflow actions. Custom automation can be added at the end of each branch. A branch can support up to 10 different outcomes for each event.
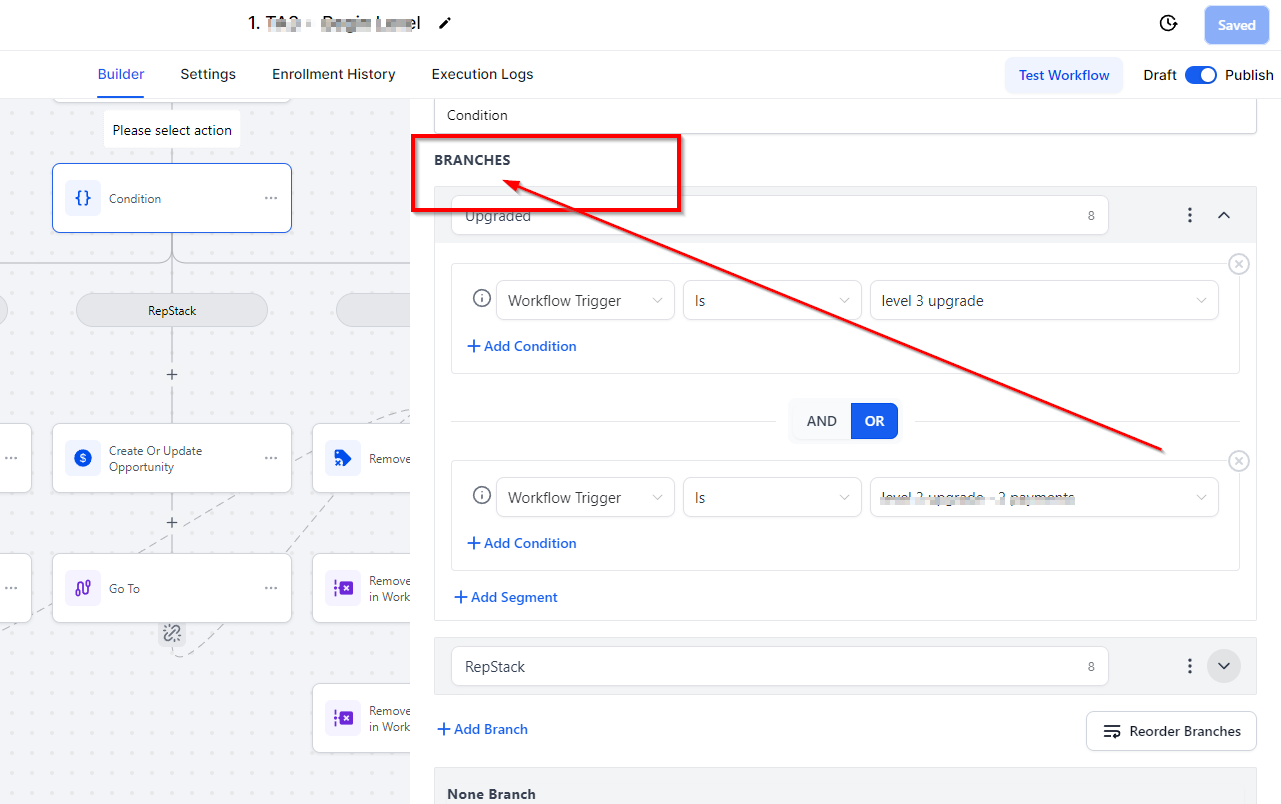
Labeling A Branch
It is crucial to label the branch based on the objective and conditional logic for easy identification and quick reference. By implementing labeled branches in your workflow, you can better organize and streamline your automation process.
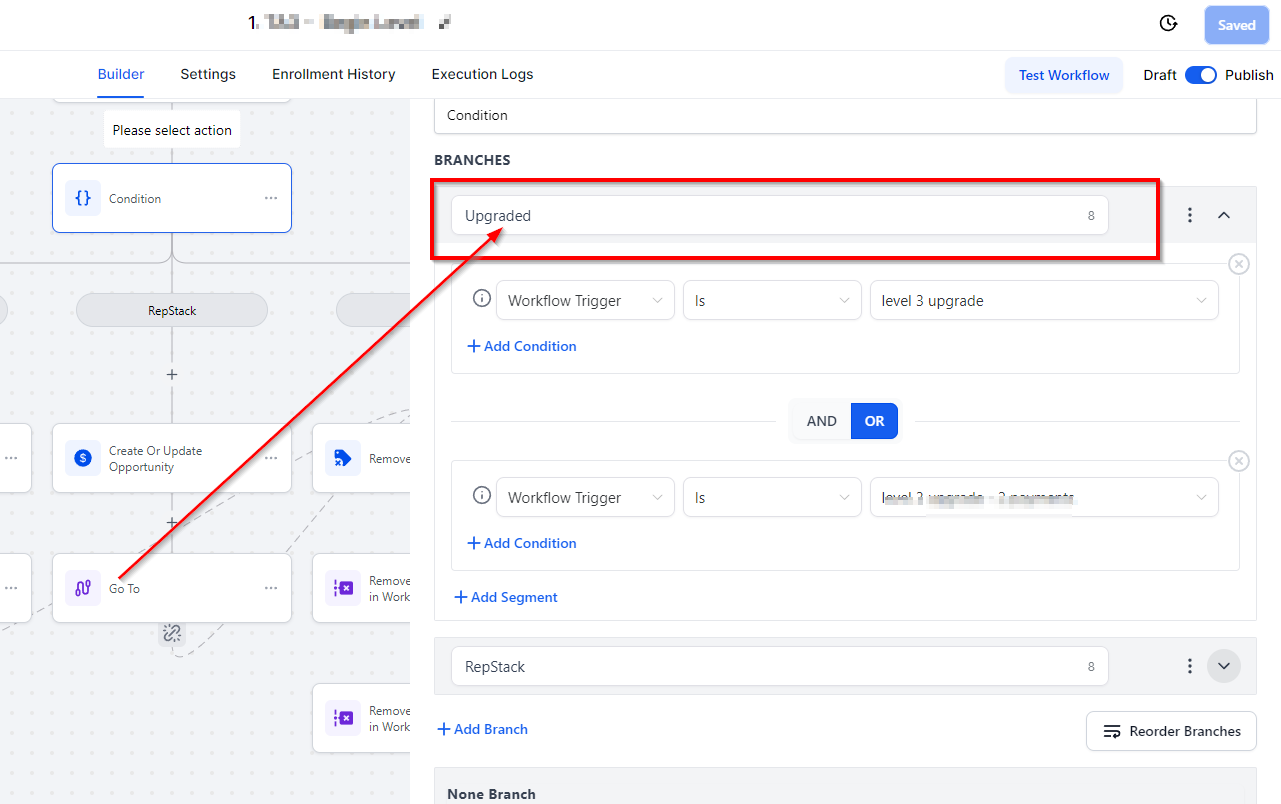
Segments
Segments are an important aspect when splitting your workflow into different paths. The segment section contains conditions and operators that can be selected according to your unique workflow journey.
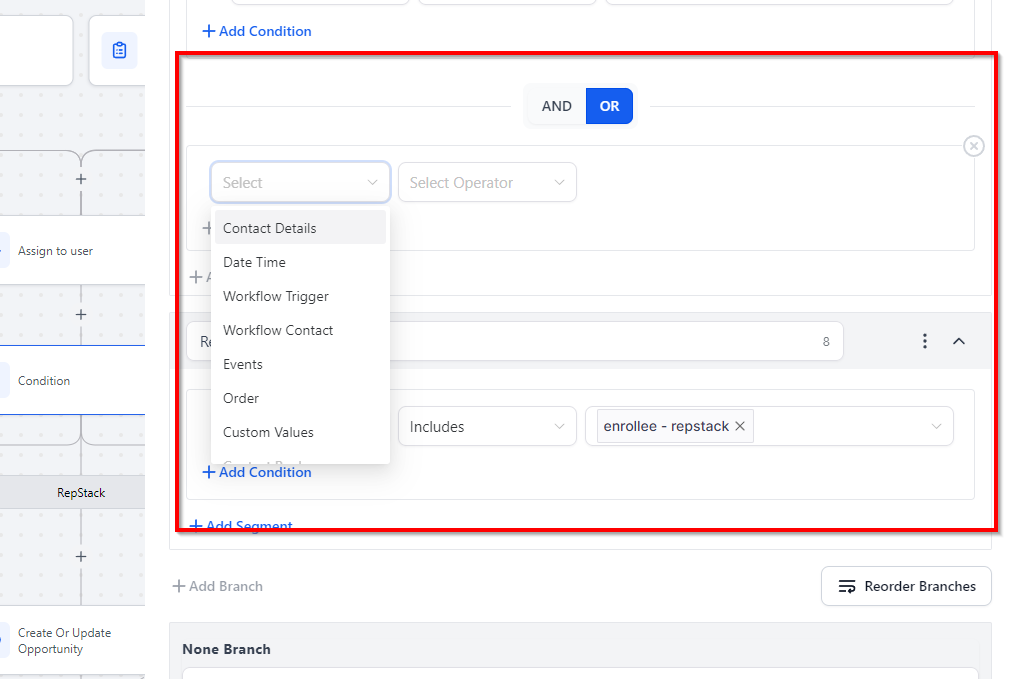
Add Segment
Adding a new segment with additional conditions and filters can be done by simply clicking on the + Add Segment icon.
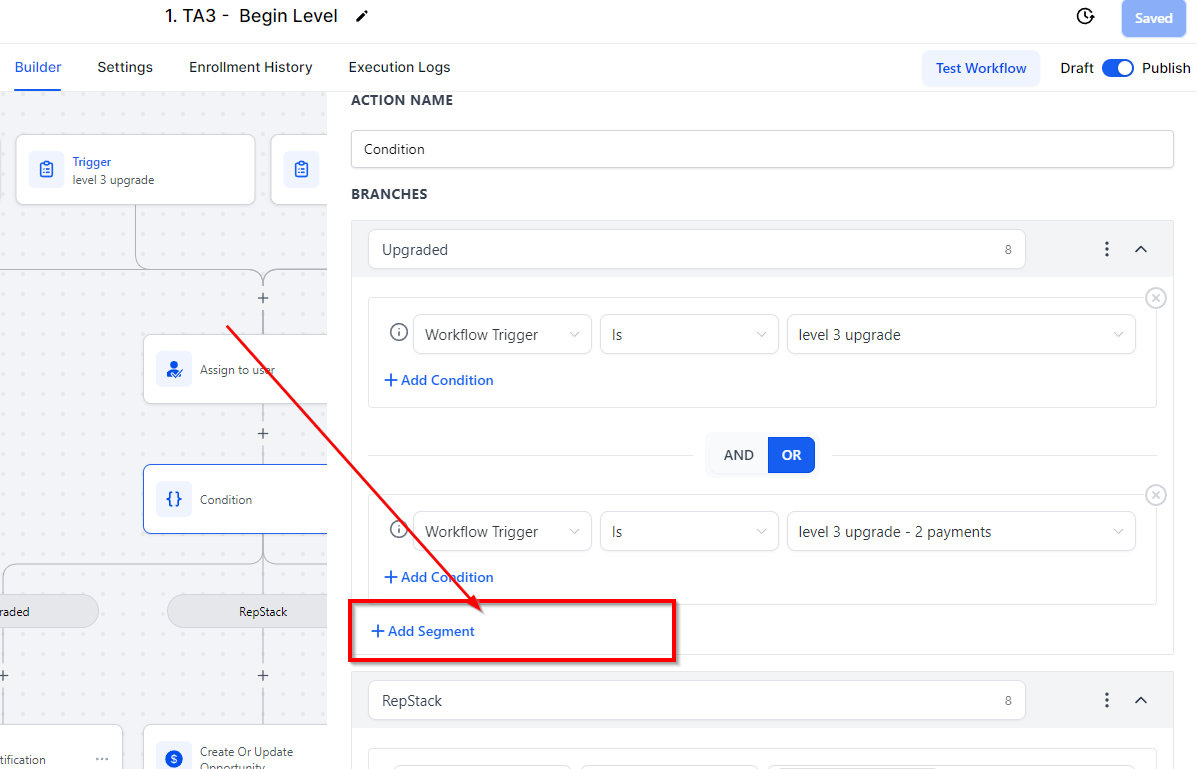
How to Use 'And' & 'Or' Segments
You can make use of 'And' and 'Or' segments to enhance your workflow automation process.
- And - Use this to let the system use two different sets of segments to work together.
- Or - Use this to let the system use either one of the multiple segments to work.
Condition
To utilize Condition in your workflow, start by selecting your desired condition from the dropdown menu.
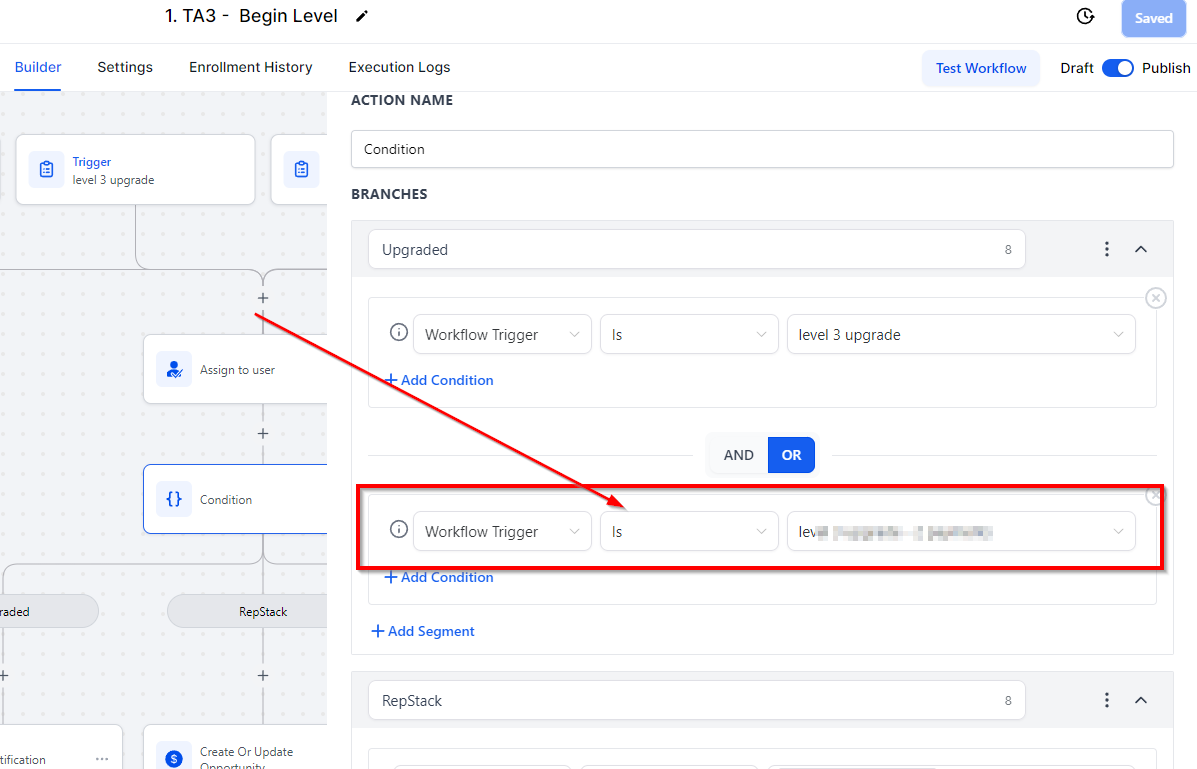
Select Operator
Based on your condition selection, you can select the required conditional parameters and add corresponding values to it.
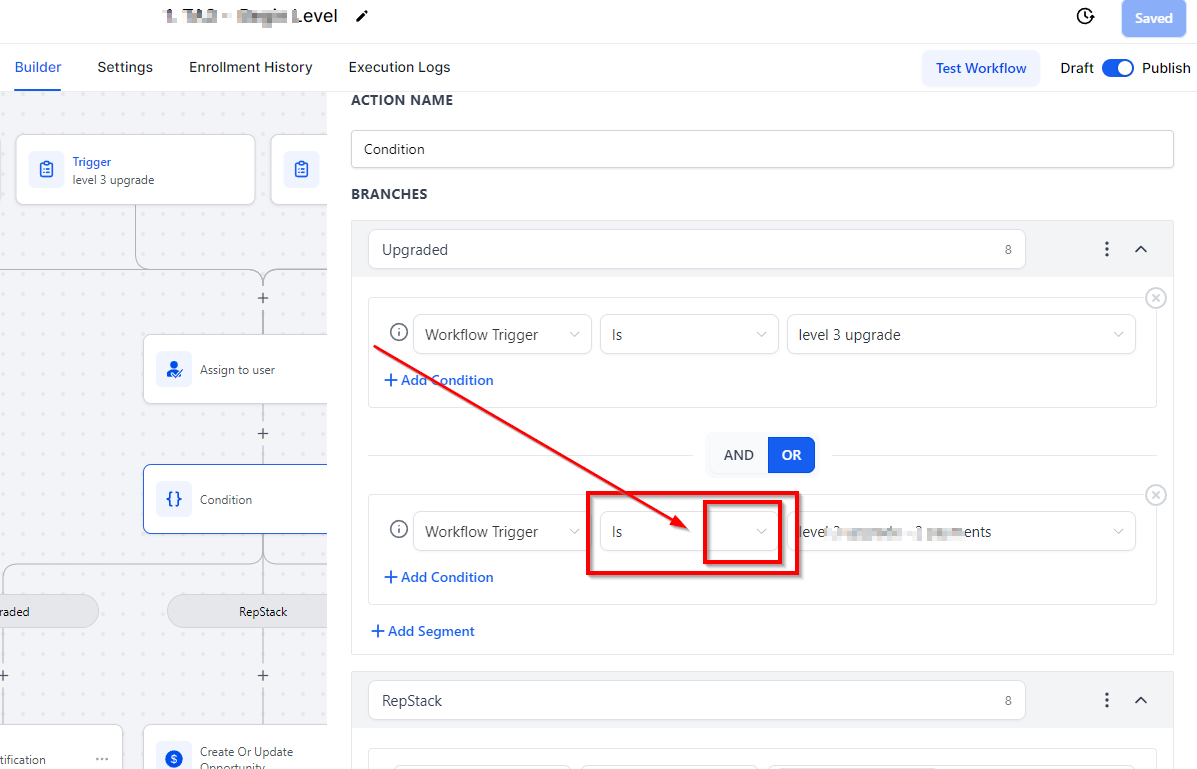
Add Condition
By clicking on Add Condition, you can add multiple sets of conditions in the same segment.
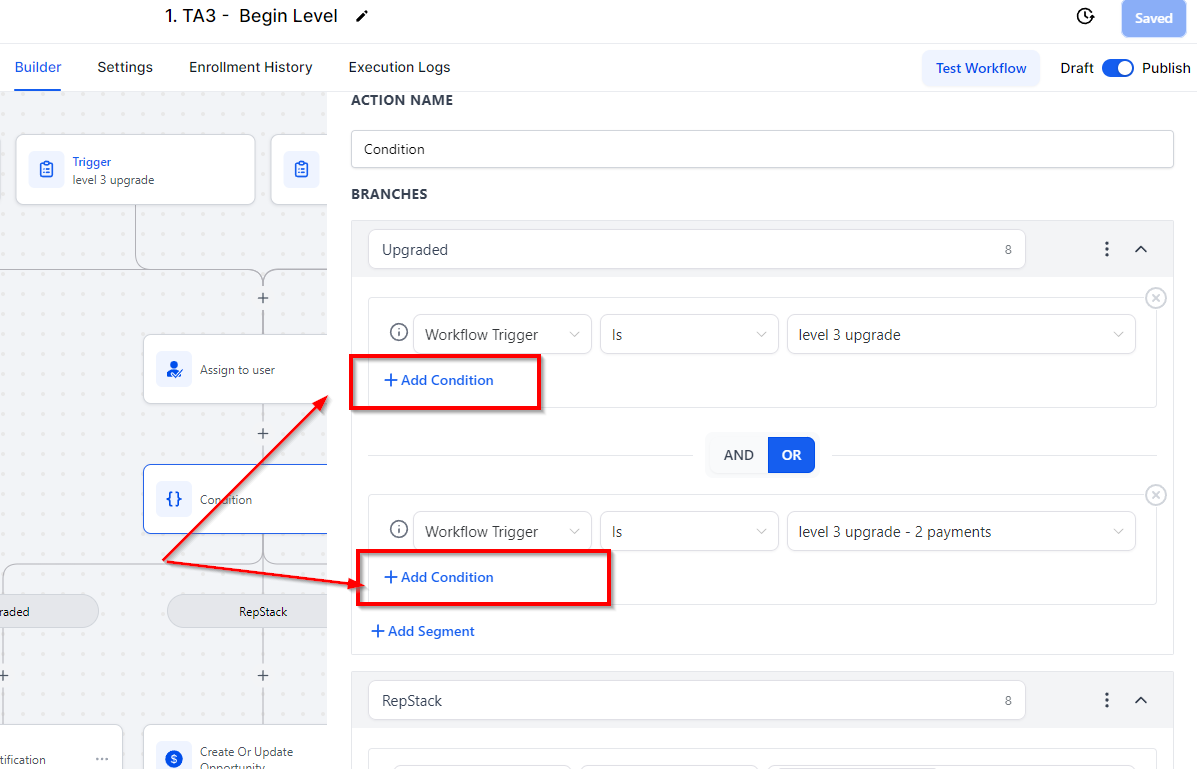
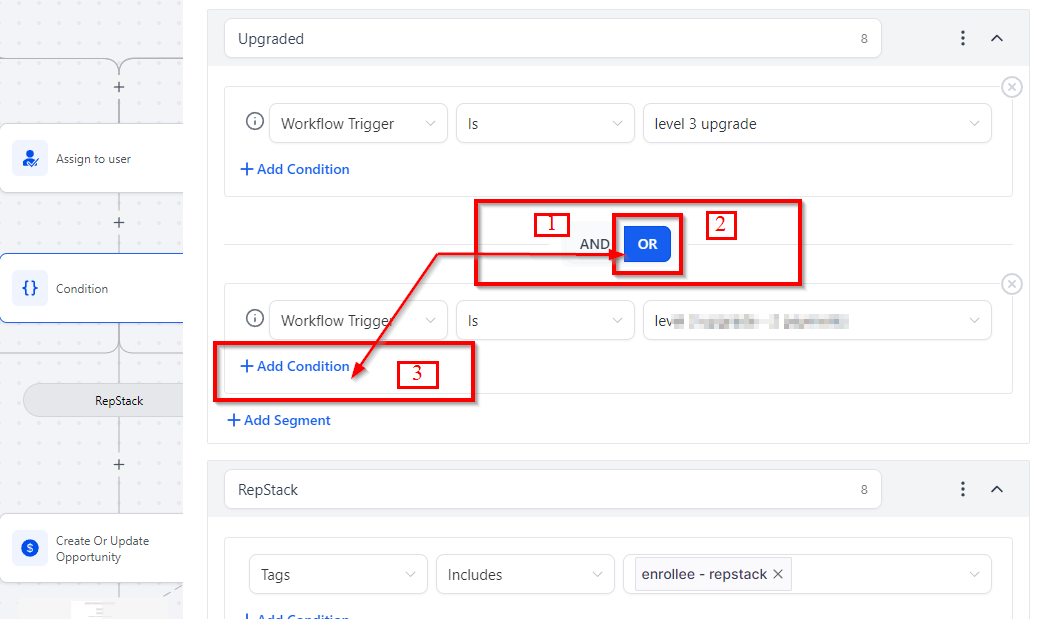
How to Use the 'And' & 'Or' Conditions Within the Segment
You can use 'And' and 'Or' conditions to apply multiple conditional logics in a segment.
- And Condition -
- Or Condition -
- Add Condition -
Examples:
Example of Using Segments with conditional logic
Include/ does not include
There are several conditional parameters in Workflow Builder where you'll have the option to specify "Includes" or "Does not include" such as Tags and multiple-option custom fields (checkbox fields, dropdown pickers, etc.).
The default logic when using multiple options with "Includes" or "Does not include" is 'AND', meaning that let's say you create a condition like this:
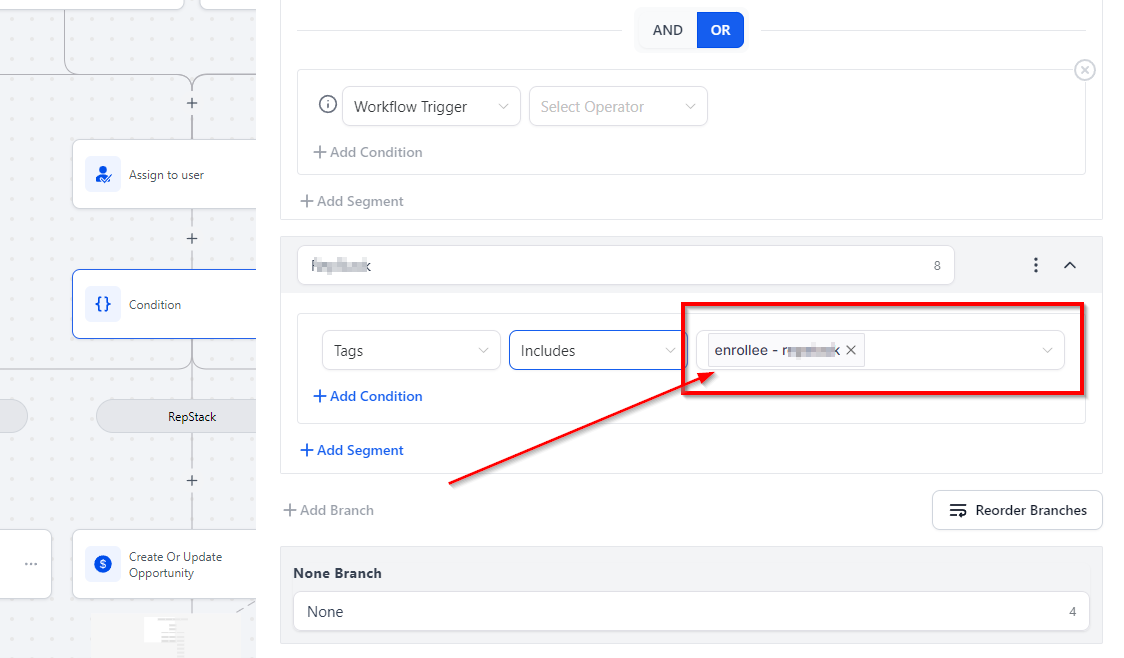
"AND" and "OR"
AND- Since the system understands and processes conditions with "Includes" or "Does not include" as "does the contact have both the '20% Discount voucher' AND '50% Off Shipping fee?", You can also decide to break two separate conditions using "AND" as well.
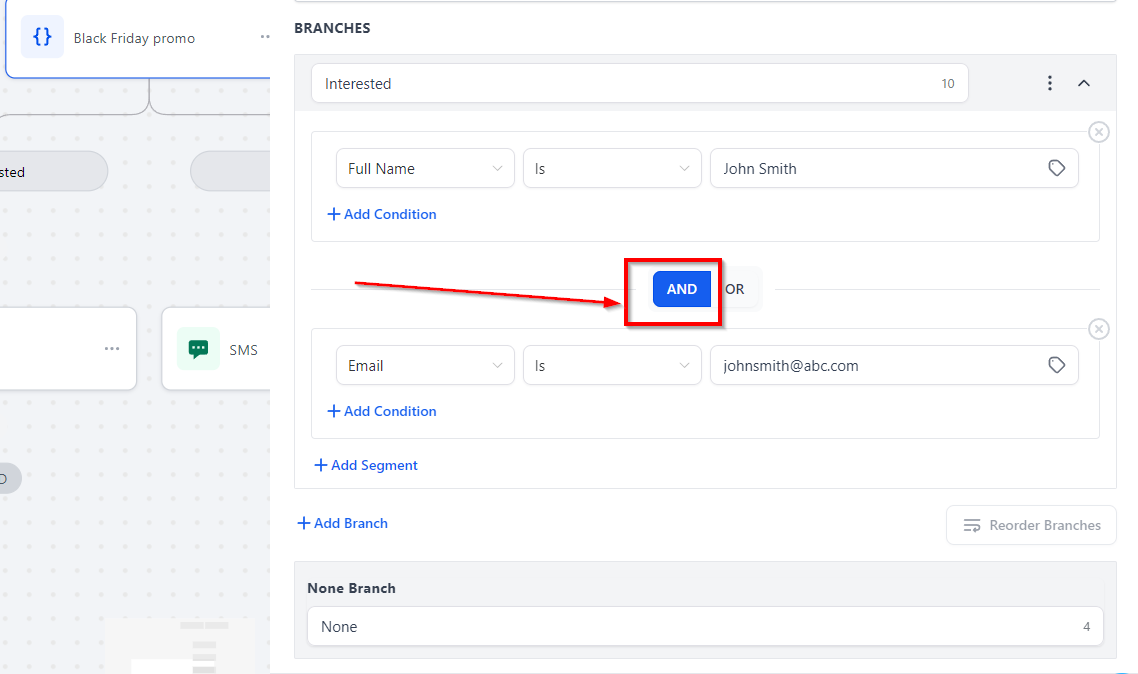
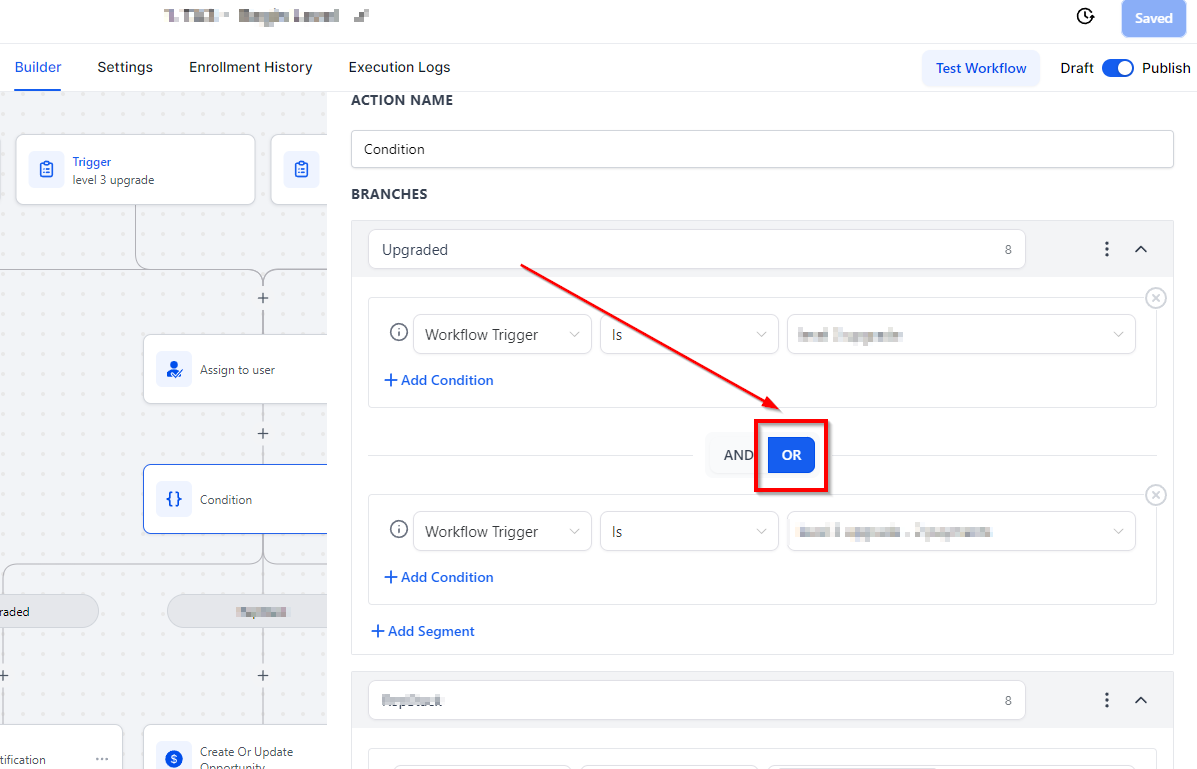
OR- If your intention is to create an "OR" scenario, you would want to select the two separate conditions and choose the OR option like this:
Example of using If/Else Branches
If/Else branches allow you to build workflow actions based on additional conditions and events. They are useful to build the workflow actions when you have one or more similar conditions but each condition requires a completely different set of actions performed when any of the conditions is met.
Let's say, you have scheduled an appointment for your client named John who offers home repair services. 1 hour after the scheduled appointment time, you would send a text message to John to check how the appointment with the contact went. In the text message, John is provided with 3 unique scenarios to choose from, and depending on what he has selected, there will be a set of workflow actions performed by the system.
As shown in the image below, John has one or more options such as 1. Showed and purchased 2. No-Show 3. Showed but did not purchase etc. When he selects "Showed and Purchased", the system will add it to the first branch, and depending on the actions you have set inside of the CRM, each workflow will be executed. As per the instructions you have provided to the system, it will perform a series of actions such as Adding a "Won" tag to the customer, sending him a 'thank you message', etc.
Similarly, when John clicks on option 2 which is "No show" then the system will perform a whole different set of workflow actions such as, adding a 'No Show' tag to the contact, Adding the contact to another email nurture sequence, etc. For each branch shown in the image down below, there will be a different path with the series of actions performed when any of the conditions are met.
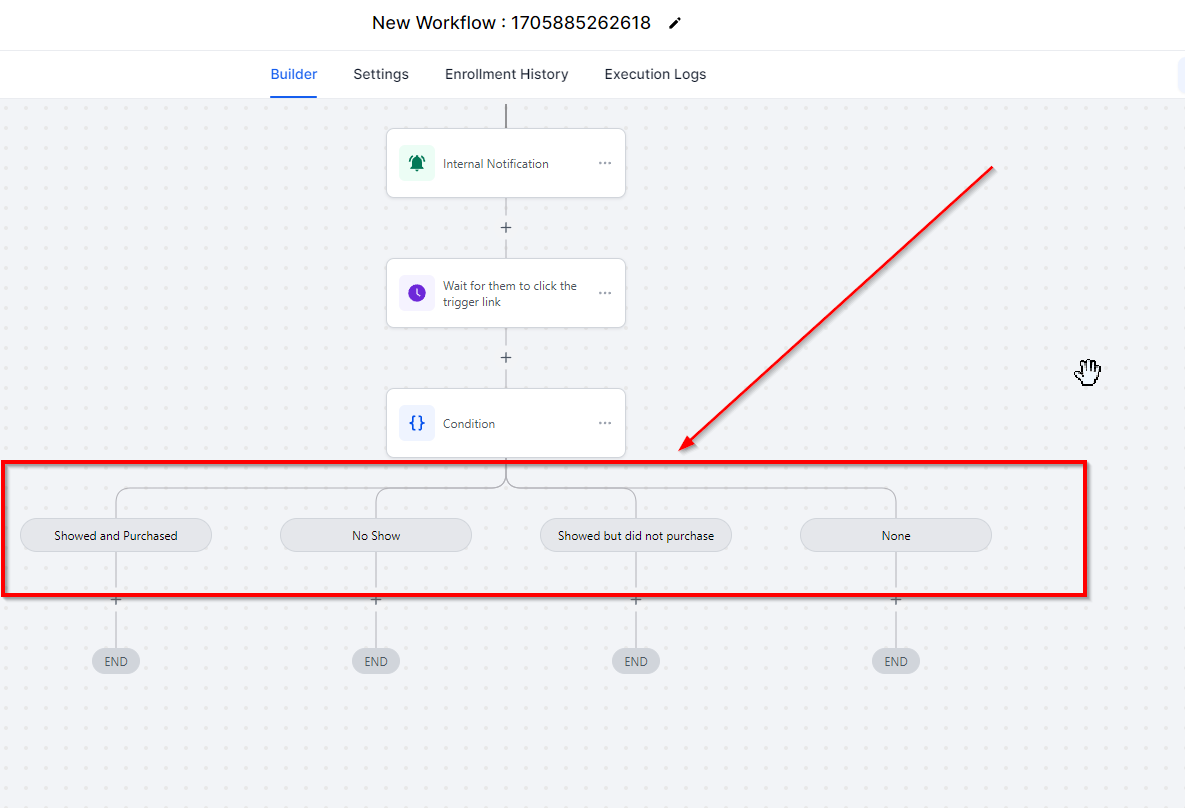
If/Else Actions Example:
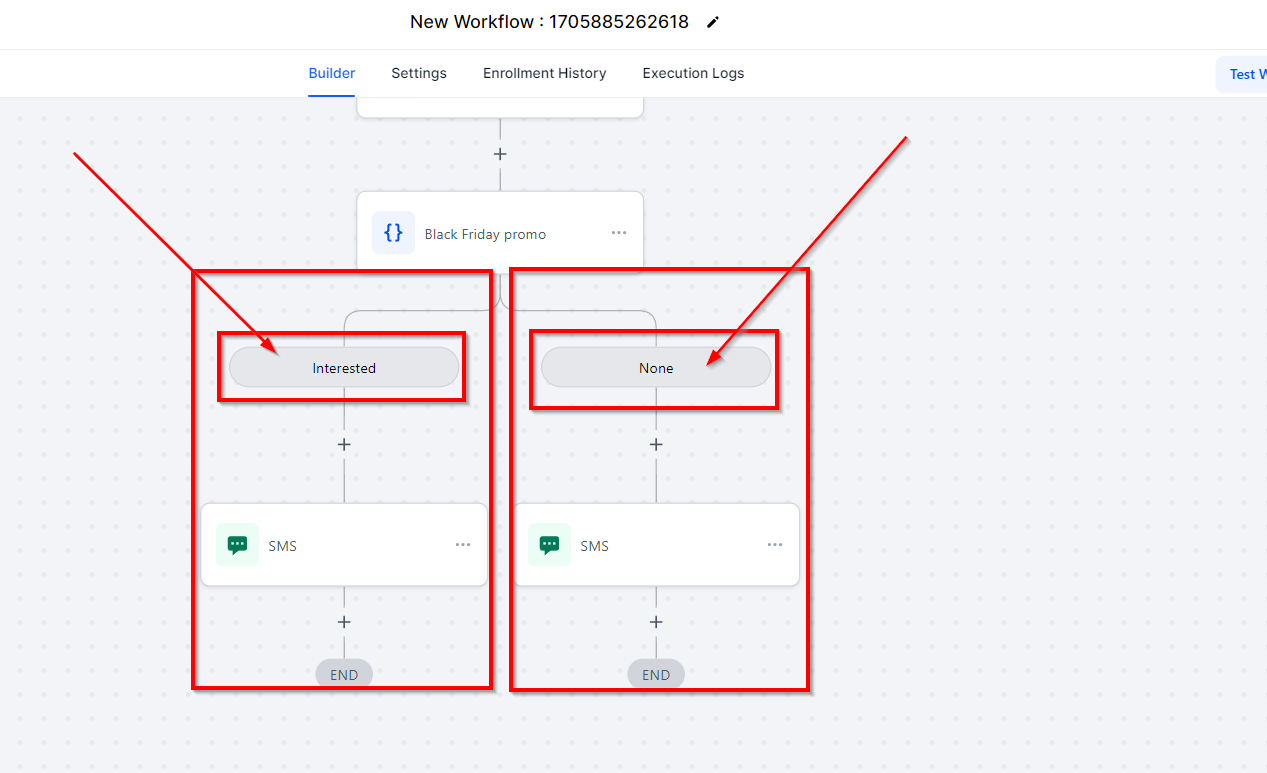
This example shows an If/Else workflow action that sends the contact/lead down to a path depending on whether or not that contact/lead replied to the "Black Friday Promo Offer" within a 24-hour time period.
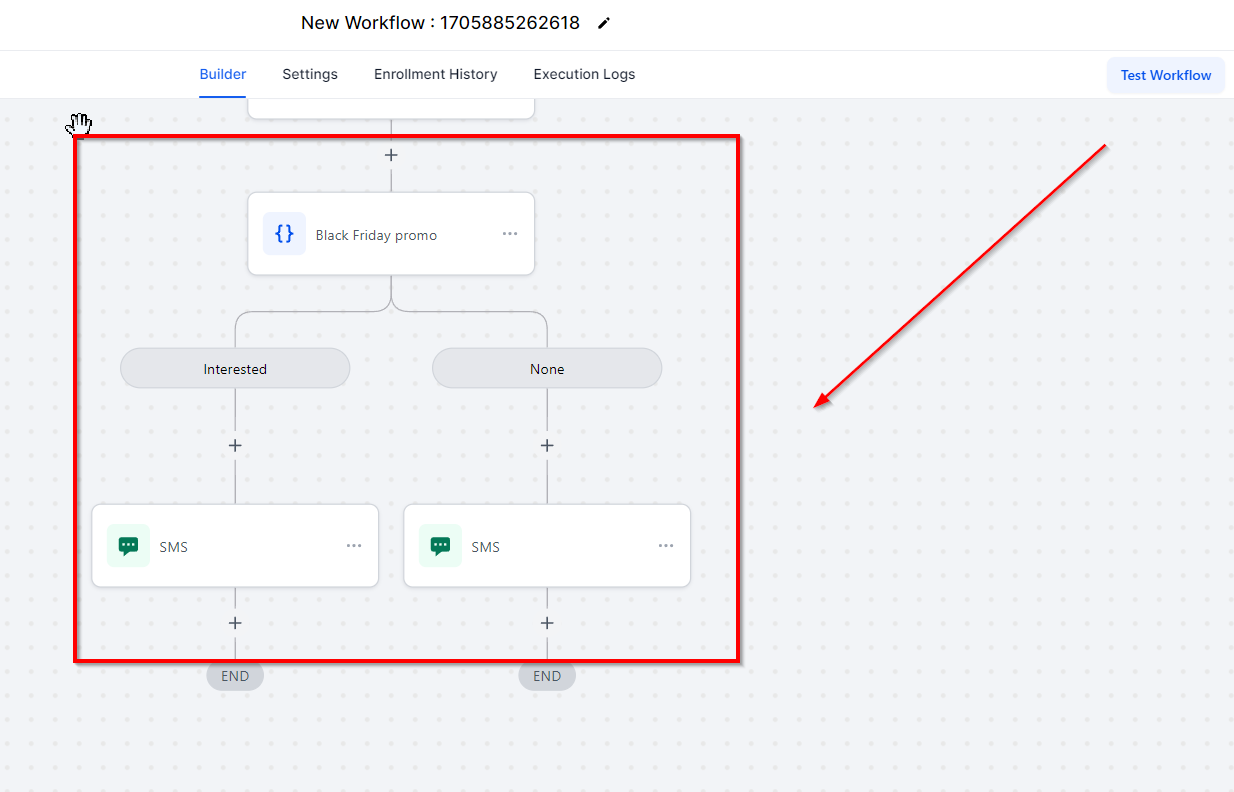
Interested Path
If the contact/lead DID reply within 24 hours, they are sent down the "Interested" path, and we send them a "Black Friday Discount SMS". (See the Image below)
No Path
If the contact/lead DID NOT reply in 24 hours, we send them down the NO path and that ends the workflow. (See the Image below)
