The Funnel products are set to Test mode, if you wish to switch mode simply go to the Settings tab and toggle on the Live mode. Your Website product will be disabled if you haven't connected it to a payment processor yet.
When you have multiple recurring products and bump products with subscriptions, you won't be able to use Paypal as a payment processor, use Stripe instead.
Adding Product To Funnel
To add a product to a funnel or website, you first need to create a new funnel page or website page.
Create New Funnel
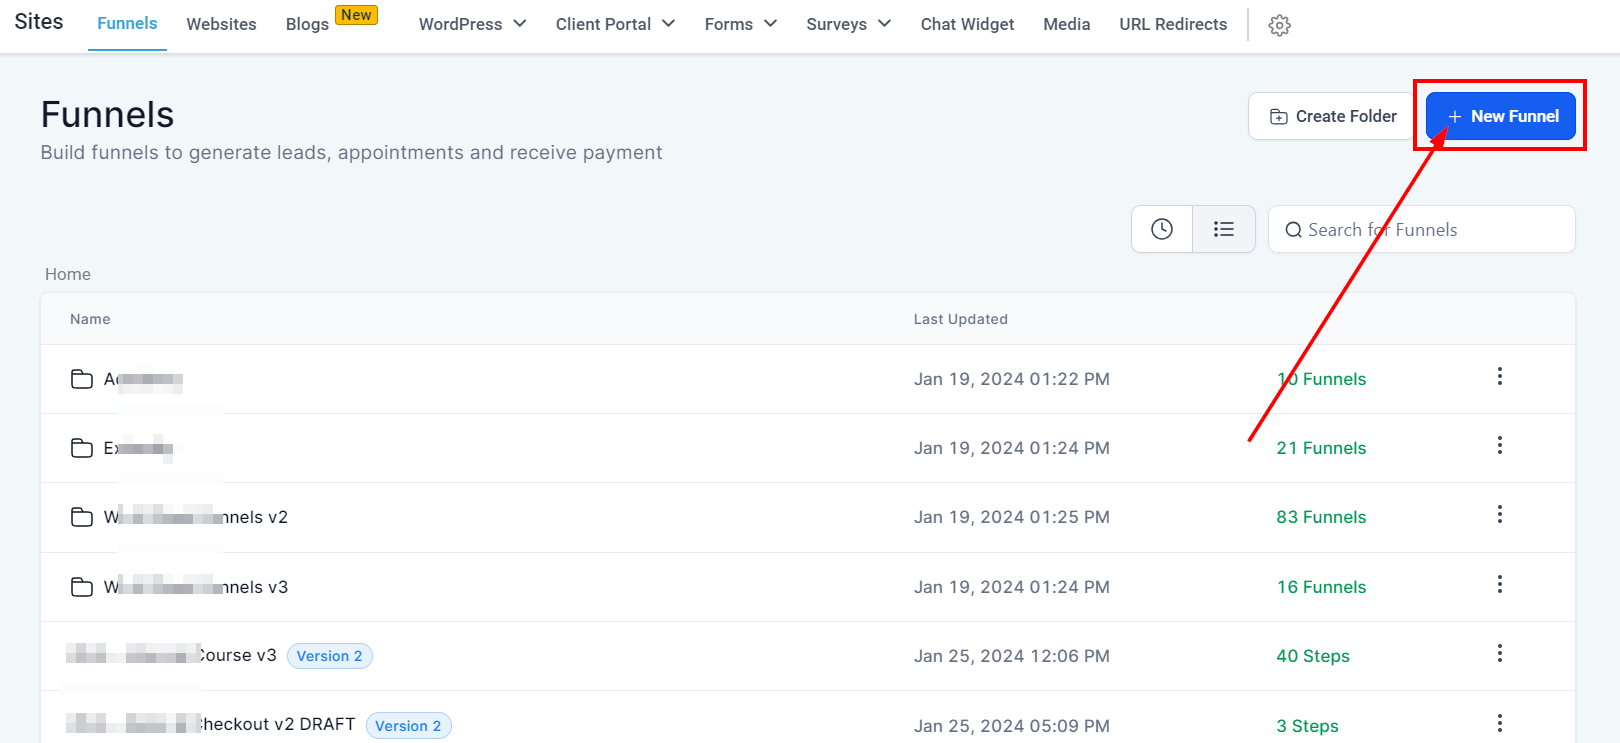
To create a new funnel, click on the green New Funnel button in the top right of the funnels tab.
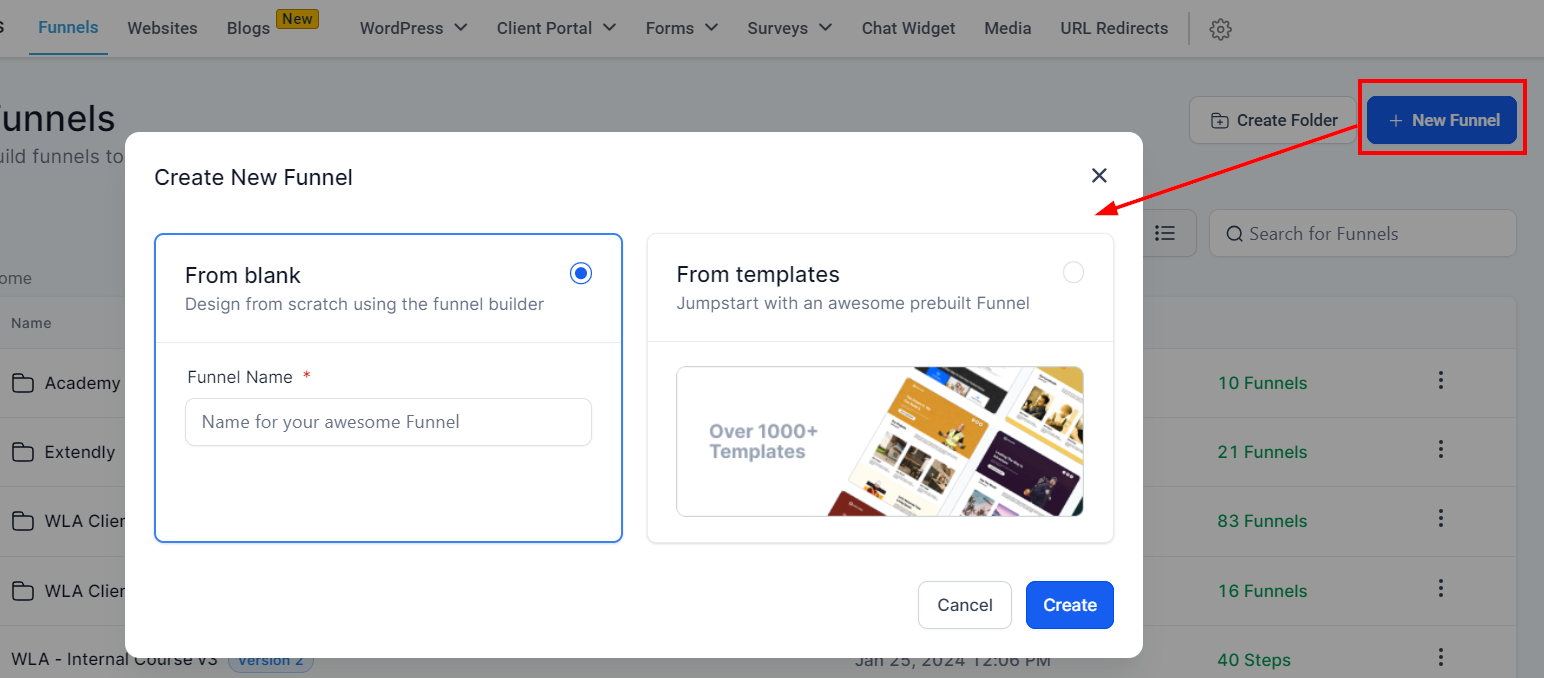
Name and Create a Funnel
Here you will give your new funnel a name and create it. For example "Sales Appointment".
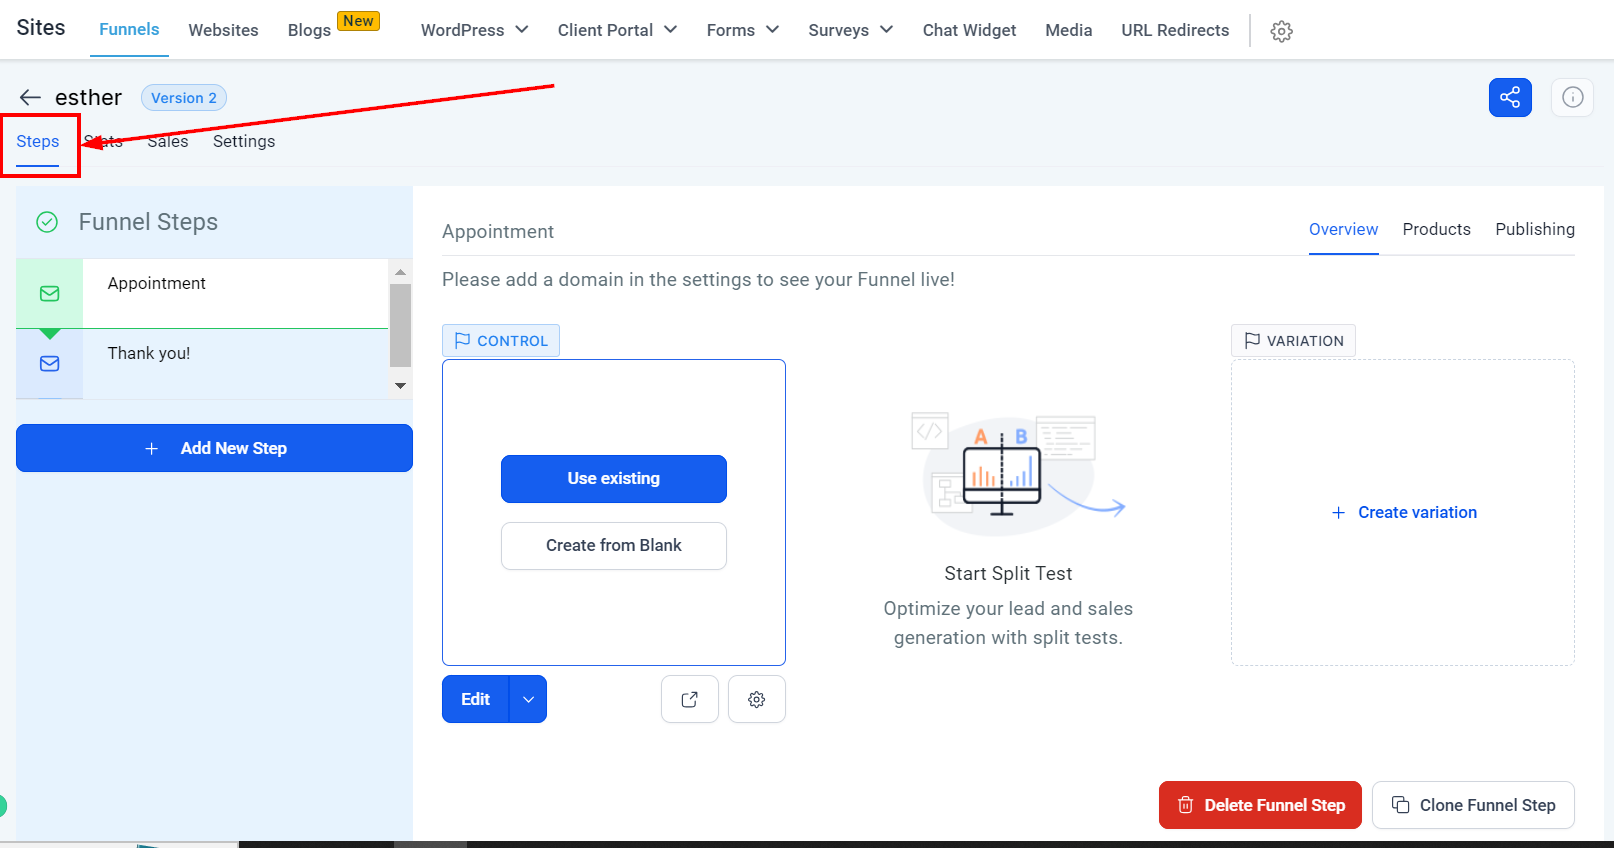
Add New Funnel Step
Once you've created a funnel, you will be directed to the funnel page. To be able to add a product, you will need to have a funnel step.
The steps in funnels help customers complete a call-to-action. For example, booking appointments. Here in the "steps" section, you will be able to create new funnel pages, organize your funnel steps, and add products to your funnel.
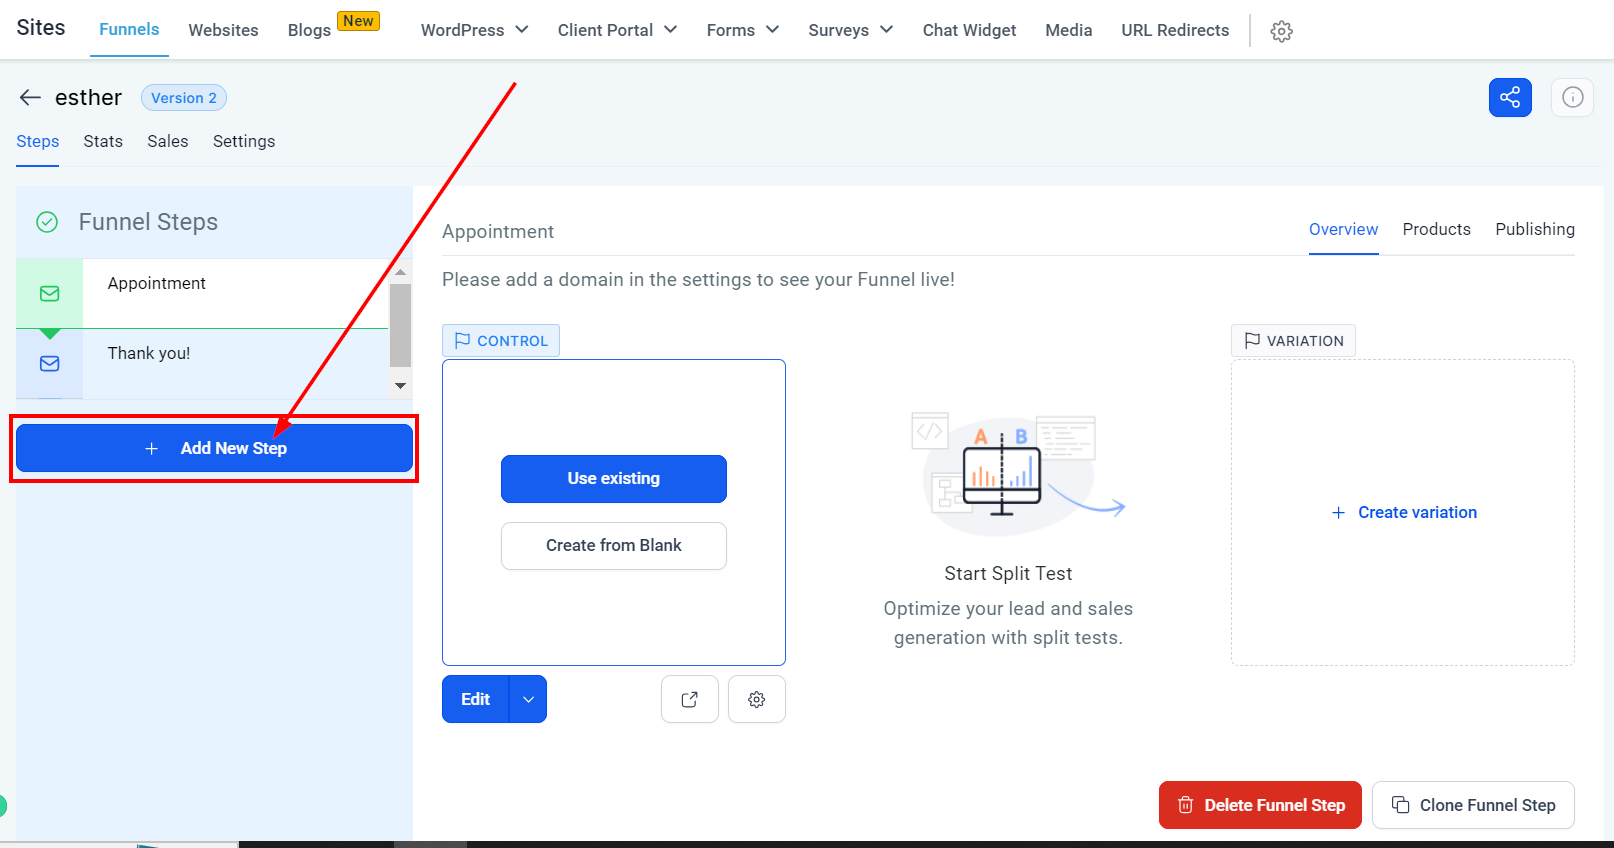
If you've not added a funnel step yet, click on "+Add New Step" to create one.
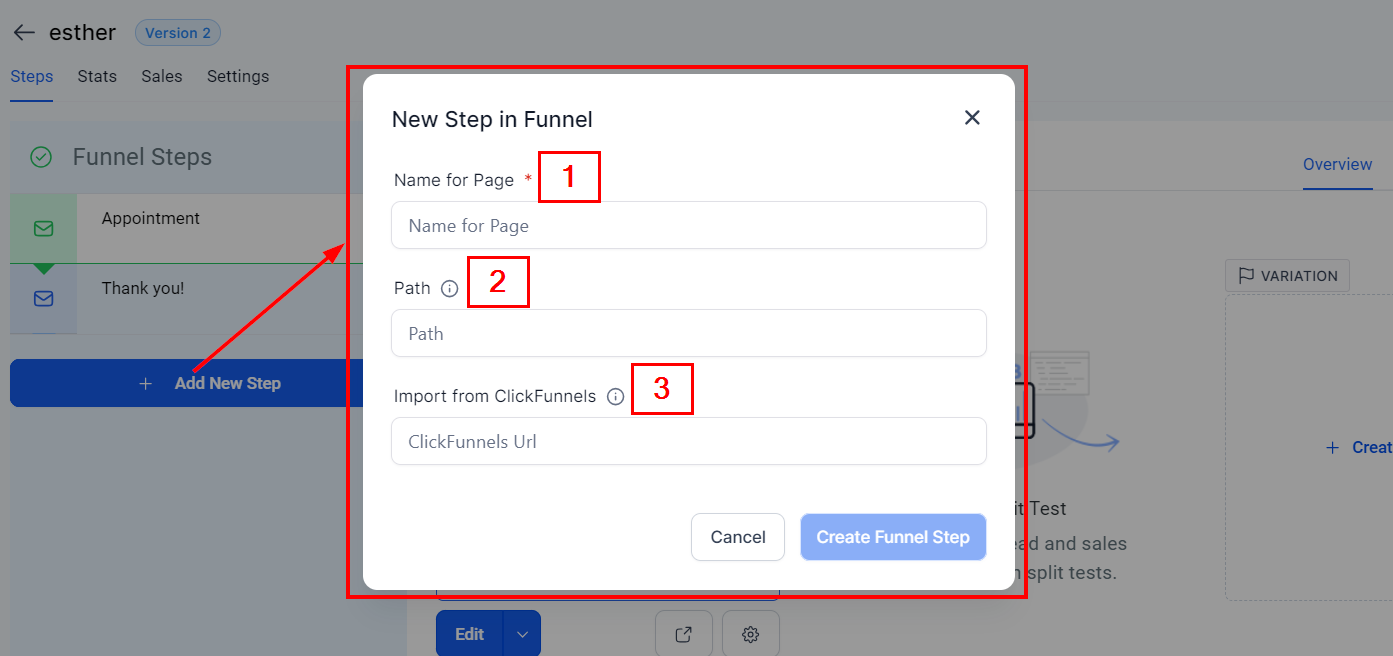
You will get a notification popup like this to add the Name for Page, Path, and the option to Import From ClickFunnels.
Name Your Funnel Step
You will need to give your funnel step a name. Make sure to organize your naming conventions for funnel steps. As you create more funnel steps, an organization will be very important!
Establish Funnel Path
You can give your funnel step a unique URL path, or you can simply name the URL path the same as the funnel step name. Adding a URL path is required to save this new funnel step.
Import From ClickFunnels (Optional)
This is optional, but you can import funnels directly from ClickFunnels! If you already have tons of content and funnels created in ClickFunnels, don't worry! Simply add the funnel URL here.
Add Products To Funnel
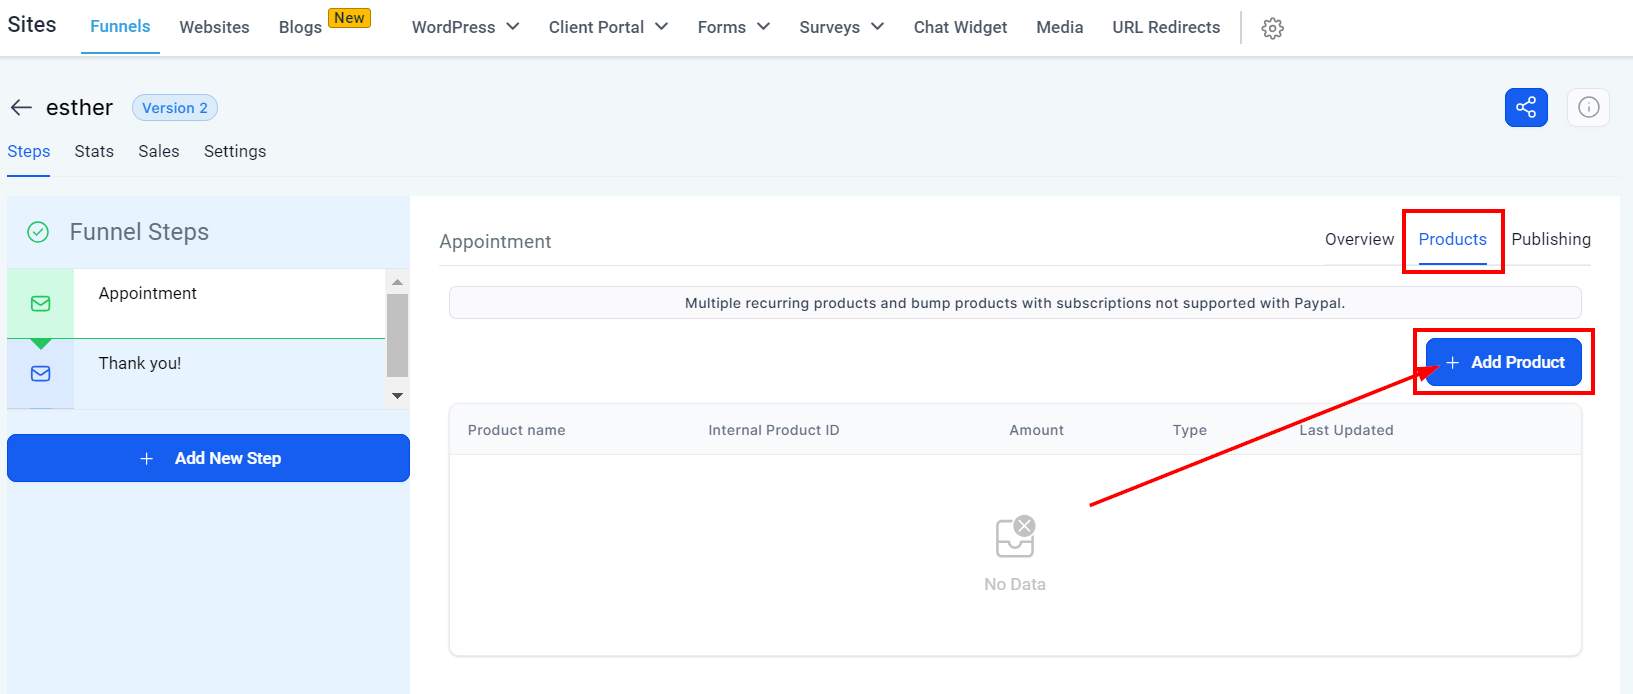
To add products to your funnel pages, access the Product Tab. Once you click on this tab, you will be directed to the product catalog. To add a product, simply click on the + Add Product button.
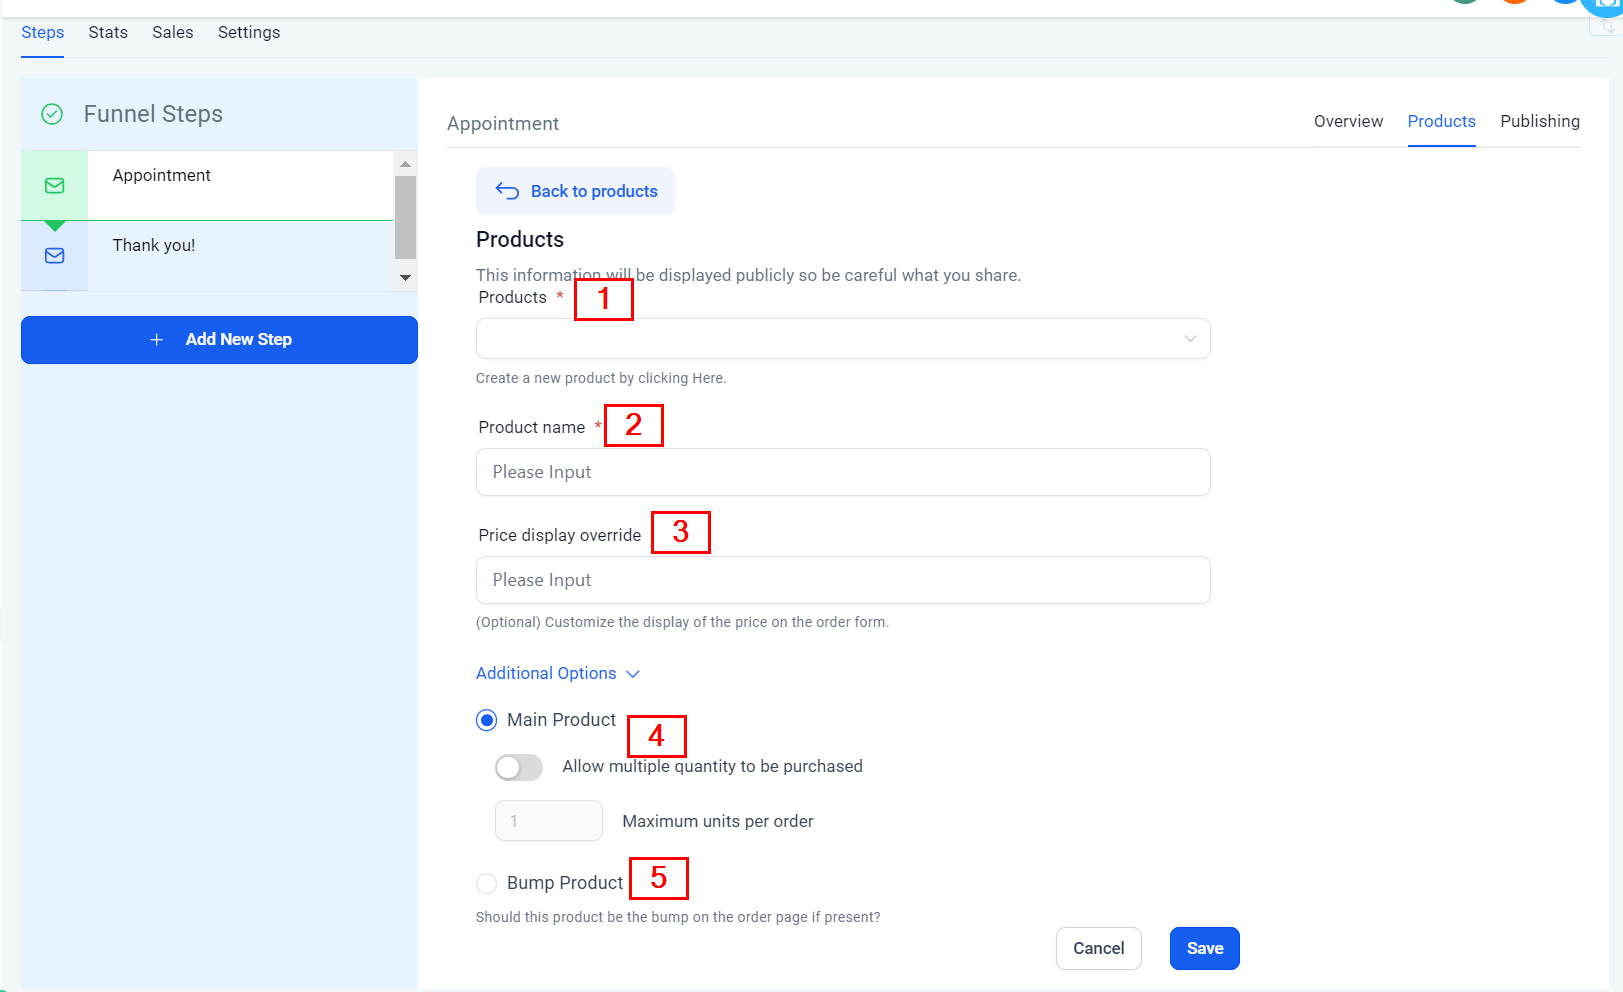
You will then be taken to the next step where you can input important details such as the product name, price display override, and the option to bump the product. Whatever information you type here will be displayed publicly so be careful what you share.
Product
Select the product you want to add to this funnel. If you've not created a Product yet, visit the Payment -> Product section to learn how to create one. Once you are done creating a product, you can then add the product here.
Product Name
You can type in the name you want this product to be displayed as. This name will be shown on the customer's Order form.
Price Display Override
You can use the "Price display override" in the case where you want to display a custom price on the Order form. If you are working with a product that has a "Trial & Setup fee", you will need to set your Price Display Override to give the Form a description, If not, the Form will only show the actual subscription amount without the setup fee.
An example of a "Price Display Override" description is a; $5 Setup Fee + $199 Monthly After 7 Days Free Trial.
Additional Option:
Main Product
To allow multiple quantities to be purchased toggle this button and type in the maximum number of products allowed per order.
Bump Product
If the product isn't a primary, it will be sold as a "Bump Product" by toggling on the Bump product option.
Adding Product To Website
You can also add a product to a website by first creating a website.
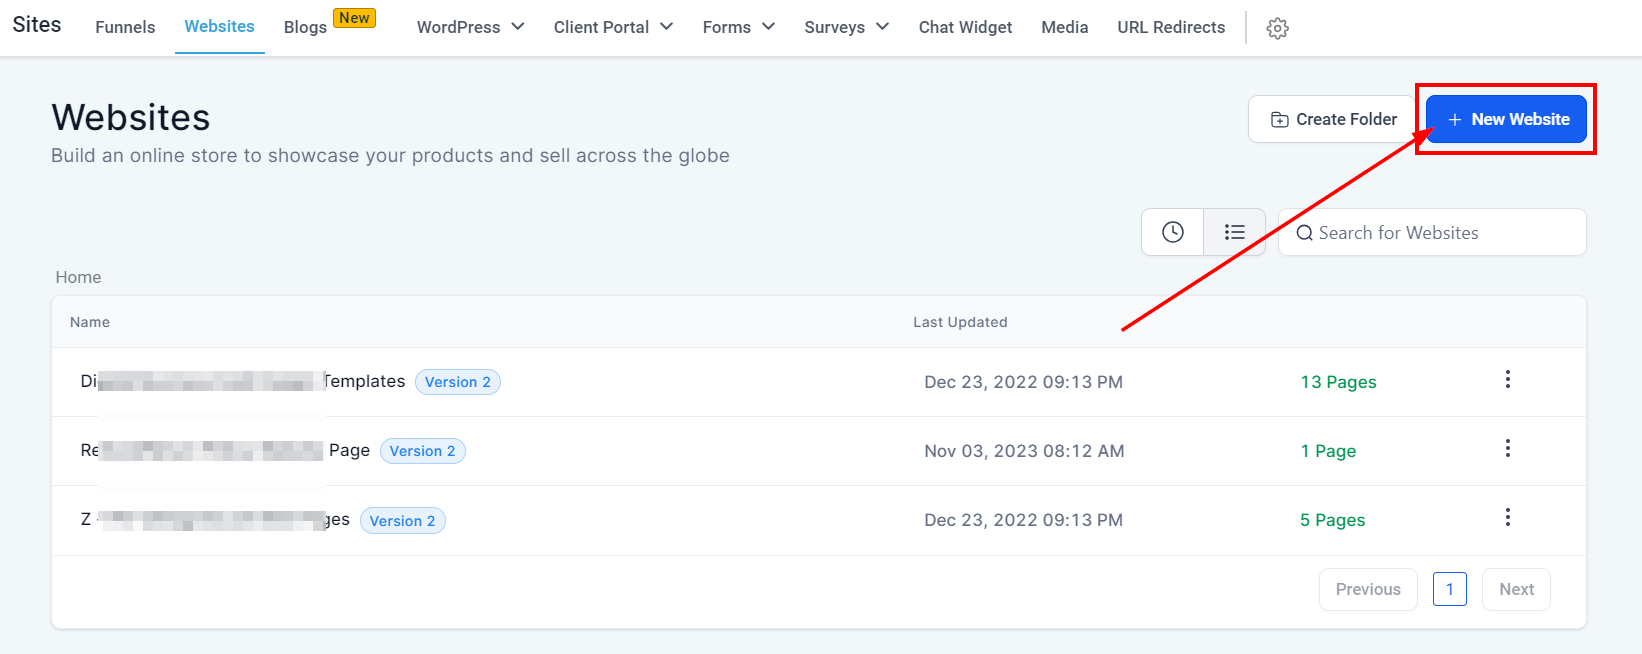
Create New Website
You can create a new website with this option. Once you click on "New Website" it will ask you to name your website.
Once you create a new website, you will be directed to this section where you can "Add a New Page".
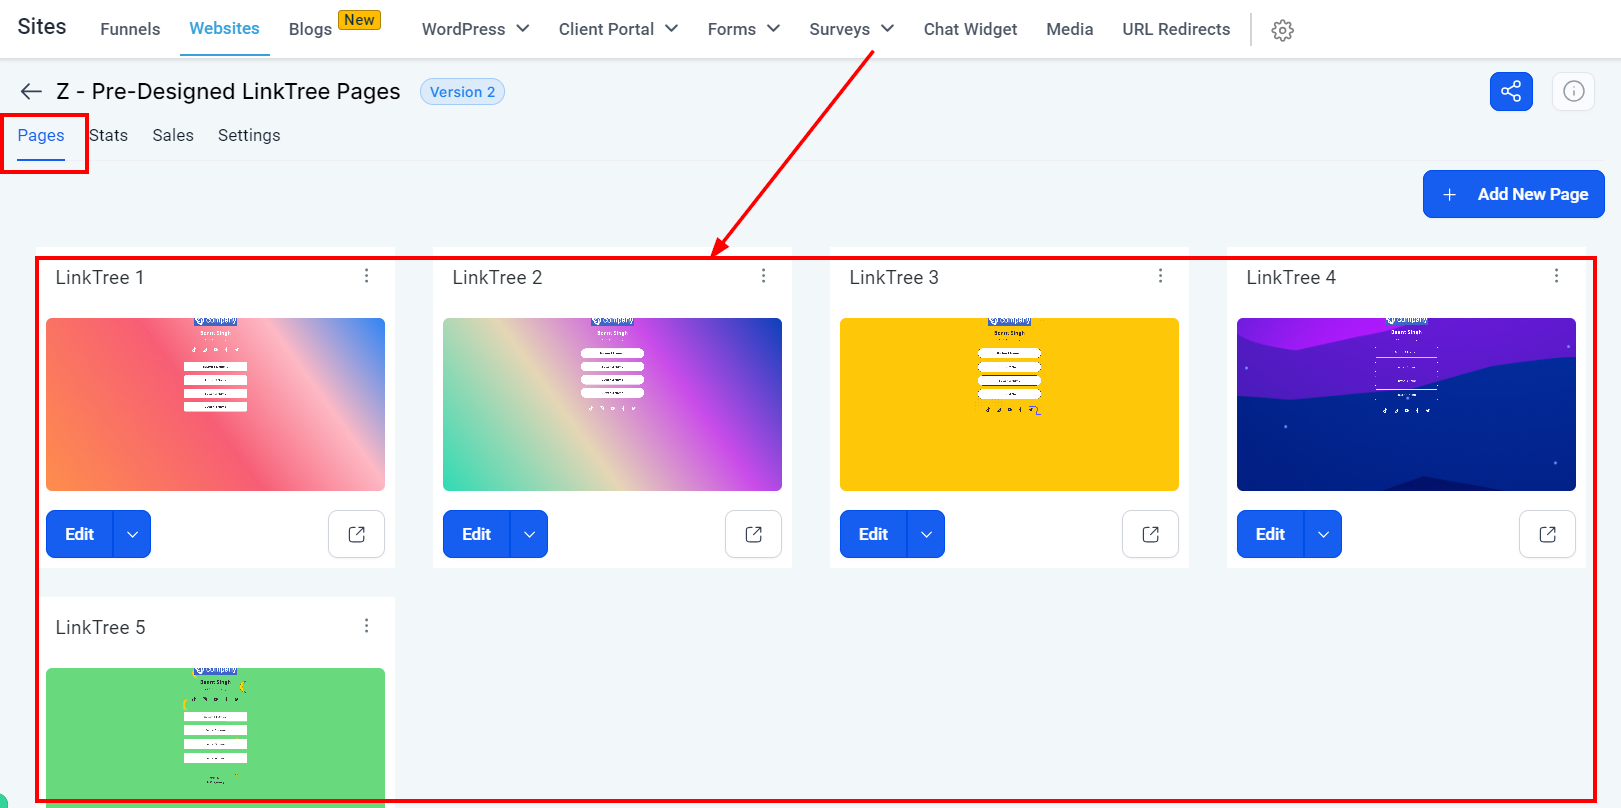
Add New Page
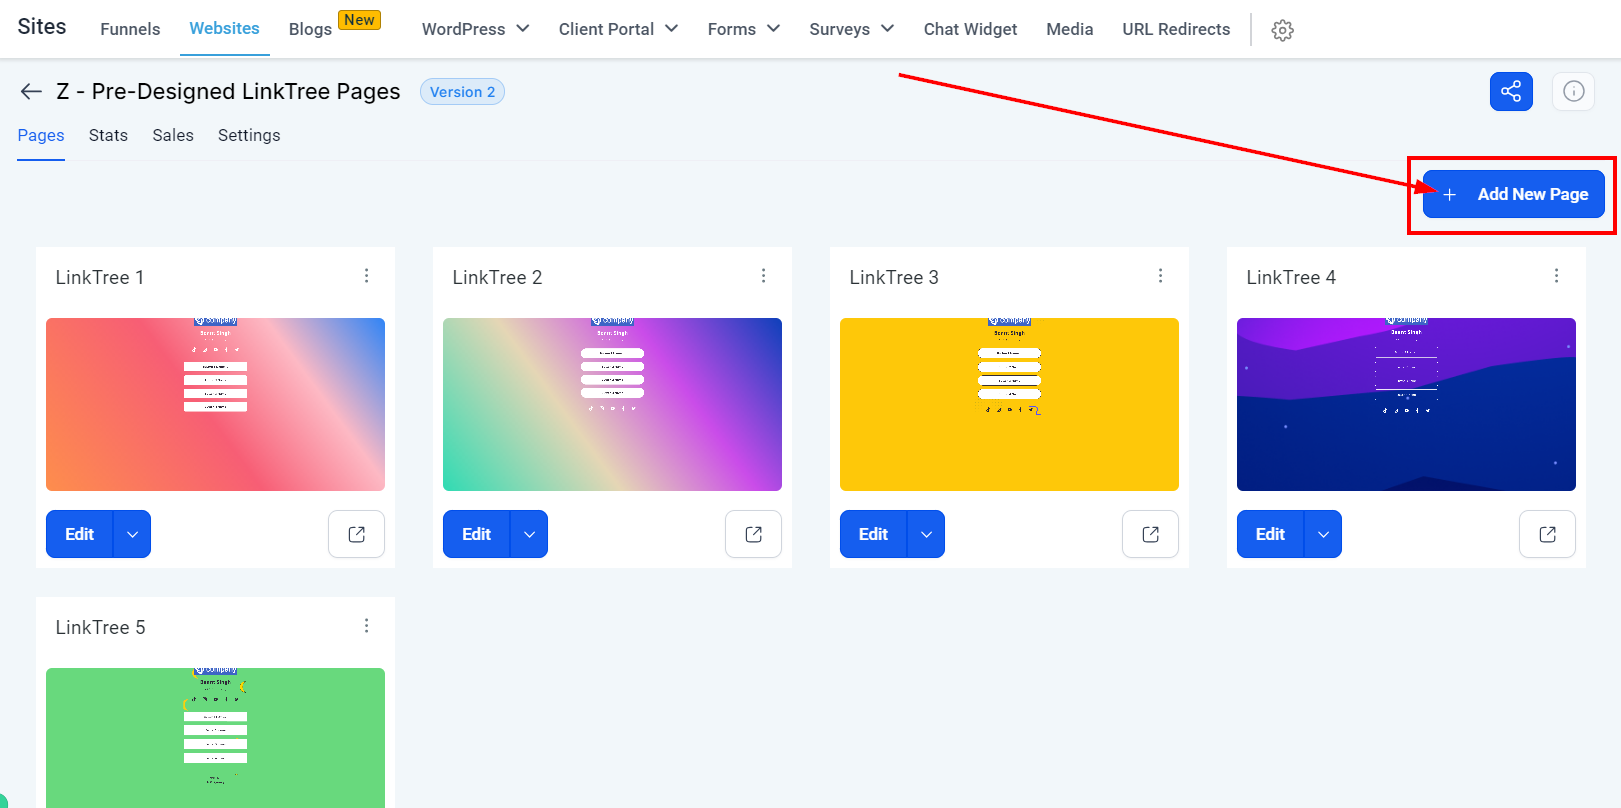
To be able to add a product, you will need to create a new page by clicking on this "+Add New Page" button as seen below.
You get a popup notification where you can create a page once you click on the "Add Page" button.
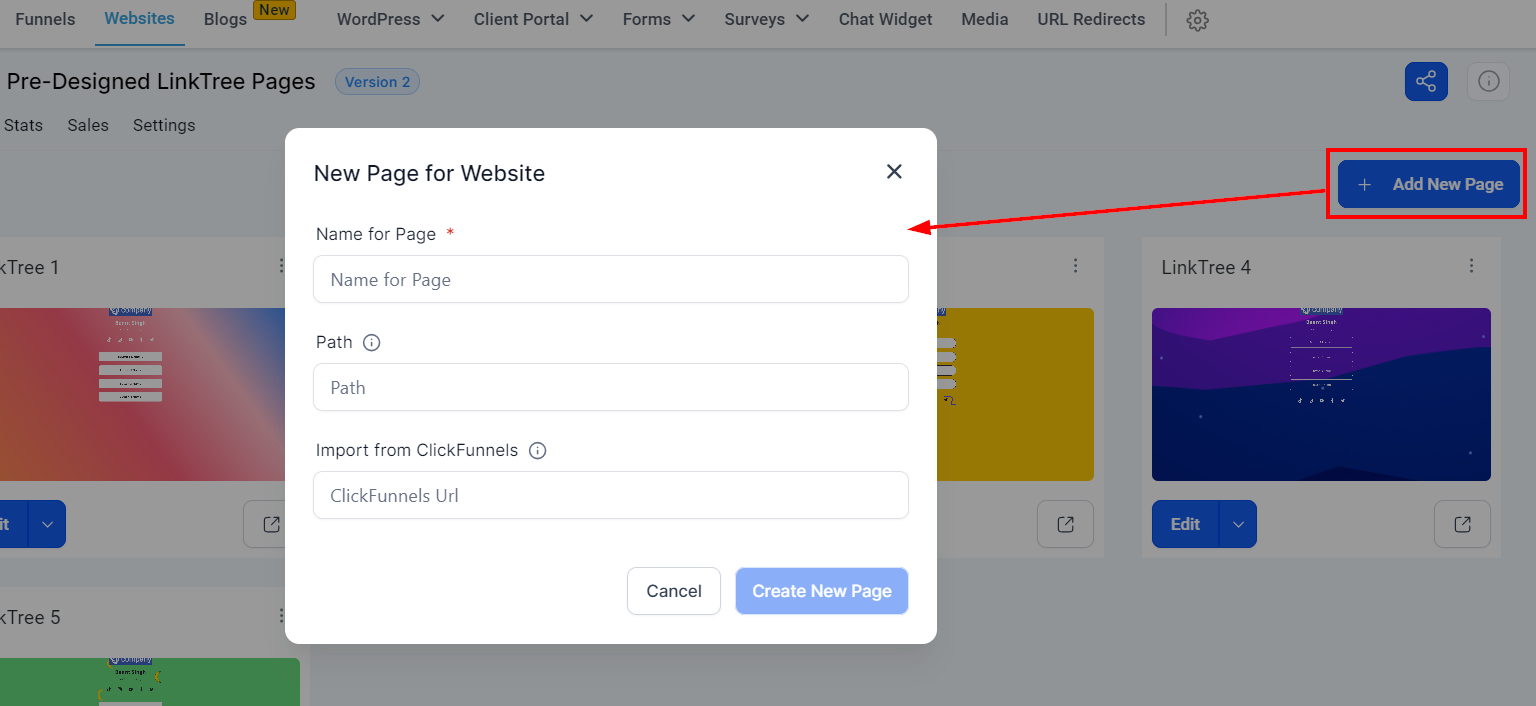
Name Your Website Page
Naming a website page will help you distribute your content across your website. When the website is divided into different pages, visitors can click on the exact page of the website that is most relevant to their objective such as "Contact us" or "About us". You can always come back and edit the name of your page if need be.
Website Path
You can add a path to your website.
Import From Clickfunnels
Just paste your Clickfunnels URL If you have pre-built funnels or content that you would like to use.
When you are done creating a page, click on the 3-menu dots in the upper right corner of the page, then select the "Product" option to add a product to a page.
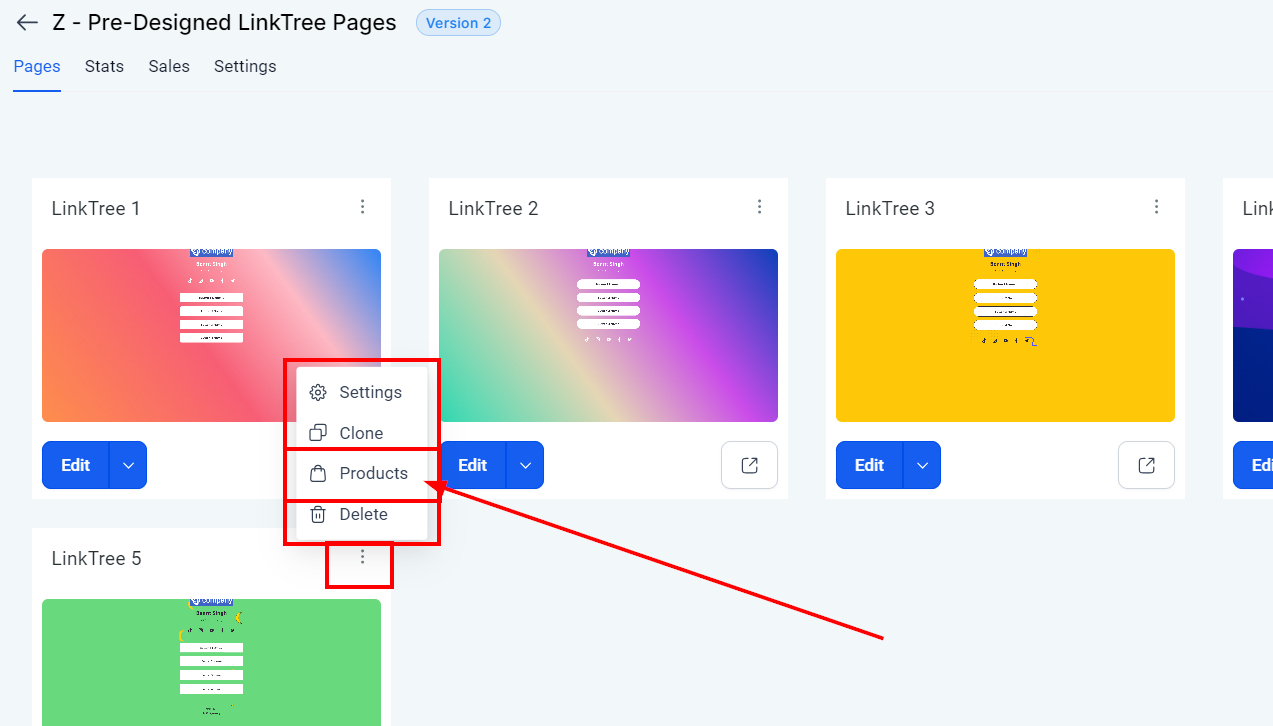
Products Tab
You will be directed to this product page once you click on the "Product" option.
Product Name
You see the name of the product here.
Internal Product ID
This is the Product ID number, in case you need to track your product within the CRM.
Amount
The amount you set to charge for this product will appear here.
Type
Here you will see the payment type you chose (One-time or Recurring payment type).
Update
This will show the latest date this product was updated.
Edit
If you want to edit your product, simply click on the "edit" icon here.
Delete
You can delete a product by clicking on the "delete" icon. This action cannot be reversed, be sure you want to delete this product and If this product is integrated with any Funnel, the funnel will be disabled. You will be asked to confirm the deletion by typing 'DELETE' in the space provided.

Add Product To Website
To add a product to a page simply click on the "+Add Product" button.

Once you click on the "+Add Product" button, you will be directed to the next step where you can add a product to your website. Please refer to Add Product to the funnel since both steps are the same.